Estradiol valerate and testosterone injections, step by step — with your Eura Health provider a message away.
If your gender-affirming hormone therapy involves injections, the first one can feel like a big deal. That’s normal. Get comfortable, put on some good music, and follow along — most of our patients tell us that within a month, injection day is just another part of the week.
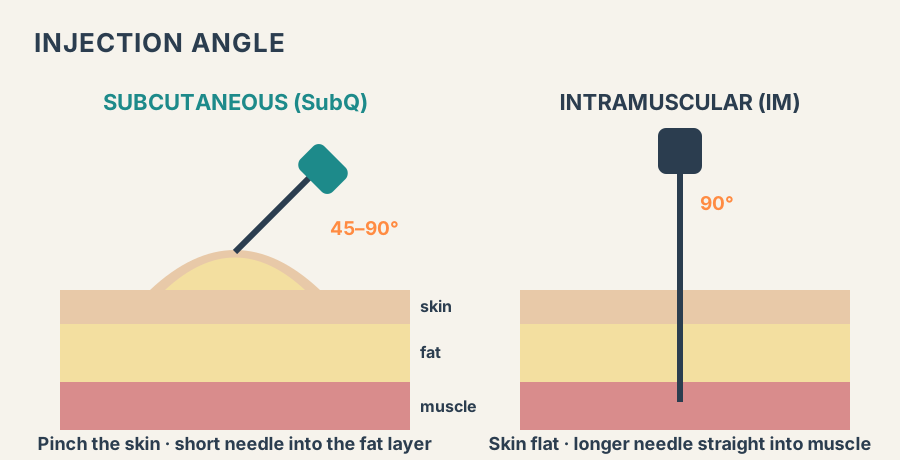
This guide covers self-injection of estradiol valerate and testosterone (cypionate or enanthate). Whether you inject SubQ (subcutaneous — into the fat layer, with a small short needle) or IM (intramuscular — into the muscle, with a longer needle), the steps are nearly identical; only the needle and the angle differ. Your prescription specifies your route, dose, and needle sizes — your Eura provider teaches you your technique at your visit, and when this guide and their instructions differ, follow your provider.
1. First things first: wash your hands
Wash with soap and warm water for 20 seconds. Cleanliness is the number one way to prevent infection — this step matters more than any other.
2. Gather your supplies and set up a clean space
Lay everything out on a clean, flat surface:
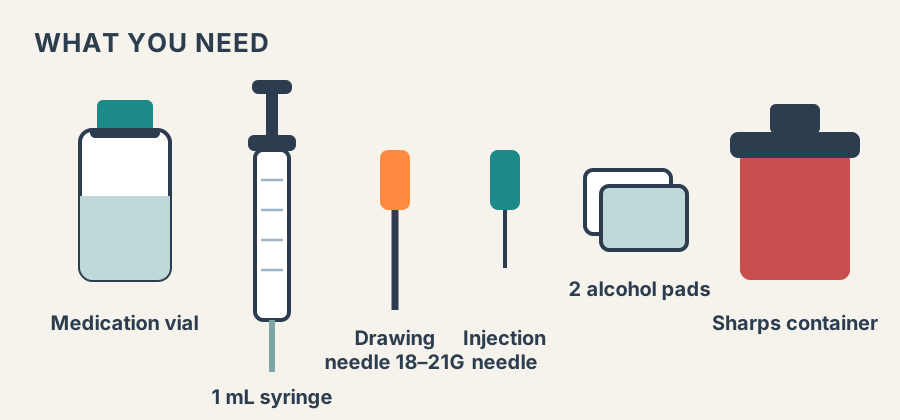
- Your medication vial (estradiol valerate or testosterone)
- Sterile 1 mL syringe
- Drawing needle (18–21G) — for pulling medication from the vial
- Injection needle — typically 25–27G, 5/8″ for SubQ; 23–25G, 1–1.5″ for IM (your prescription specifies yours)
- 2 alcohol pads
- Band-Aid and gauze
- Sharps container
Never reuse needles or syringes. One injection, one fresh set.
3. Check your medication
- Correct medication name and concentration
- Not expired
- Clear liquid — no cloudiness, discoloration, or particles
Cold oil is thicker and stings more — warm the vial in your hands for a minute or two first.
4. Clean the vial top and prep the syringe
Wipe the rubber stopper with an alcohol pad and let it dry for 10–15 seconds. Attach the drawing needle to the syringe, then pull the plunger back to draw in air equal to your dose (for a 0.2 mL dose, draw 0.2 mL of air).
5. Inject the air, then flip and draw
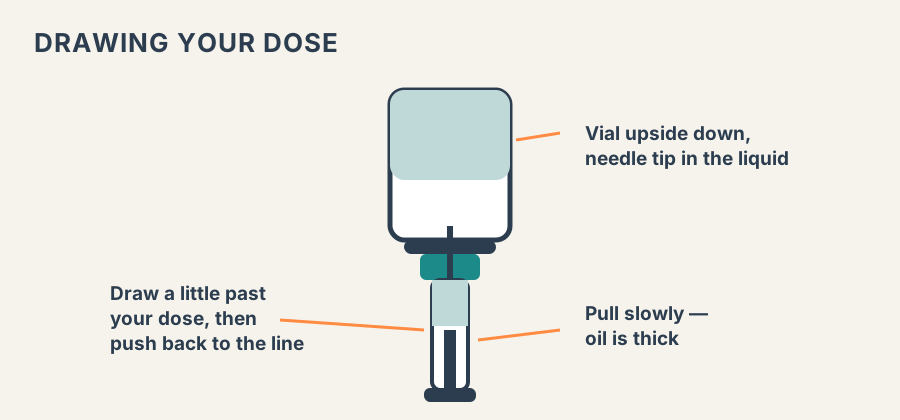
Push the drawing needle through the center of the stopper and inject the air — this equalizes pressure so the thick oil draws easily. Then flip the vial upside down, keep the needle tip in the liquid, and pull the plunger slowly. Draw slightly past your dose, then push back to the exact line.
6. Switch to your injection needle
Remove the drawing needle (into the sharps container) and attach your fresh injection needle. This also means the needle entering your skin was never dulled by the vial stopper — fresh needles are sharp needles, and sharp needles hurt less.
7. Clear the air bubbles
Hold the syringe needle-up, tap so bubbles rise, and gently push the plunger until a tiny drop of oil appears at the tip. A small air bubble isn’t dangerous in SubQ or IM injections — this step is about accurate dosing, not danger.
8. Choose and clean your injection site
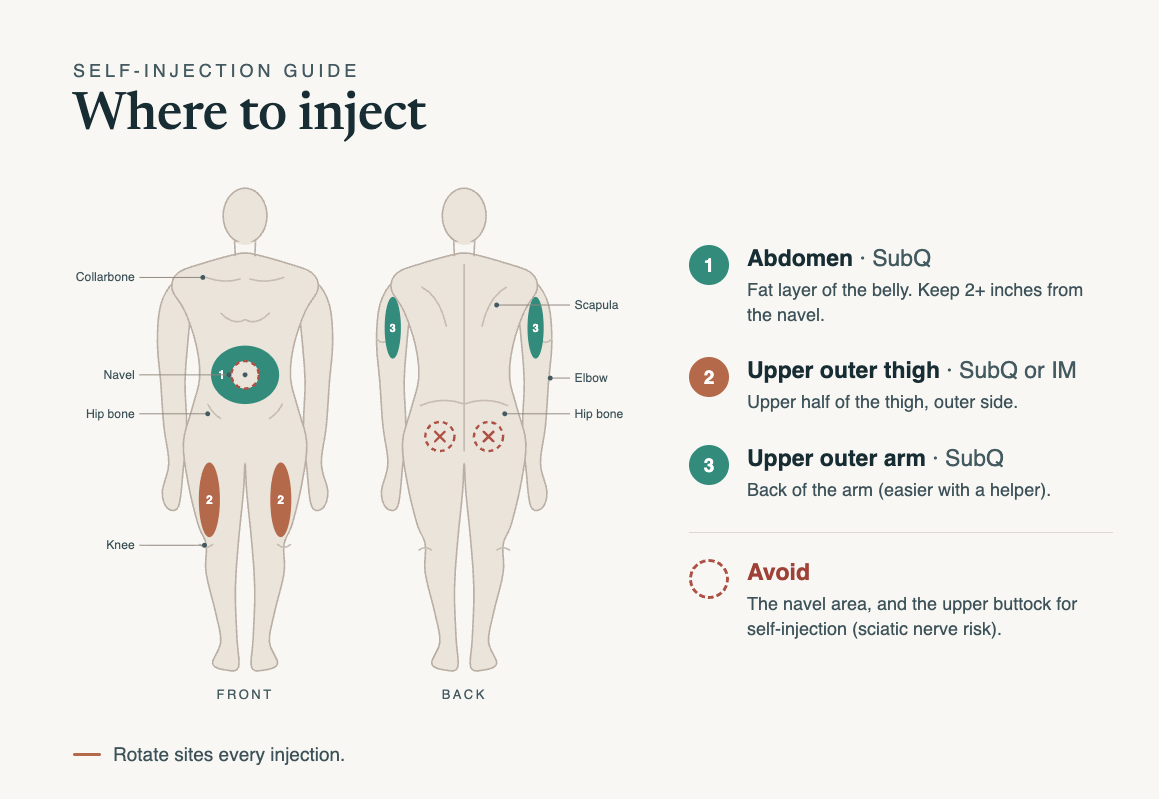
SubQ: belly (two inches or more from your navel), upper outer thigh, or the back of the upper arm (easier with a helper). IM: the upper outer thigh is the standard self-injection site — the upper half of the thigh, toward the outer side, well above the knee. We don’t recommend the upper buttock for self-injection — it’s too close to the sciatic nerve.
Rotate sites every injection — left thigh, right thigh, left belly, right belly. Wipe the site with your second alcohol pad and let it air-dry for 10–15 seconds (injecting through wet alcohol is what causes the sting).
9. Inject
SubQ: pinch a fold of skin and fat, insert the needle at 45–90° in one smooth motion, release the pinch, and push the plunger slowly — oil takes 10–30 seconds.
IM: stretch the skin flat, insert the needle at 90° in one confident motion, and inject slowly. Confident beats tentative — a slow, hesitant insertion hurts more.
10. Withdraw and press
Pull the needle out at the same angle it went in. Press gauze on the site for 15–30 seconds — don’t rub. A drop of blood or oil at the surface is normal. Band-Aid if you want one.
11. Dispose safely
Needle and syringe go straight into the sharps container — never the trash. Wash your hands again. Done.
Troubleshooting
A little blood when you withdraw — normal; press with gauze. Bruising — common; rotate away from it. A sore lump for a day or two — oil absorbs over days; warm compresses help. If a site is hot, increasingly red, or more painful after 48 hours, contact us. Hard to push the plunger — that’s thick oil and a small needle; go slow and steady. Missed a dose — take it when you remember if within a couple of days; if it’s close to your next dose, message us instead of doubling up.
Contact Us Promptly If
- Spreading redness, warmth, and fever after an injection (possible infection)
- Severe pain, numbness, or tingling during or after injection
- Hives, facial swelling, or trouble breathing — seek emergency care
- Chest pain or shortness of breath — seek emergency care
You Don’t Have to Figure This Out Alone
Every Eura Health patient starting injections gets taught — with your actual supplies, until you’re comfortable. If your first solo injection goes sideways, that’s what we’re here for: message us through the portal or bring questions to your next visit.
Not yet a patient and considering hormone therapy? Start with our HRT timeline guide, or book a consultation.
This article is general health information, not medical advice, and it doesn’t create a patient relationship. Your prescription — medication, dose, route, and needle sizes — is individual. Always follow the instructions given by your prescribing clinician.